Marketing Cloud Account Engagement (also known as Pardot), is a marketing automation platform designed to support the needs of B2B organisations. Given the sheer magnitude of the platform as well as the accompanying jargon and terminology, you’d be forgiven for thinking that Marketing Cloud Account Engagement requires significant know-how to use.
If anything, the opposite is true. Marketing Cloud Account Engagement has recently overhauled the landing page builder and the resulting improvement in user experience is substantial. Landing pages are created using easy drag-and-drop components – so no more HTML coding!
In this How-To guide, we explain exactly what goes into creating dynamic landing pages. The accompanying visuals provide a useful template to follow directly or tweak according to your needs.
For assistance with the implementation of Marketing Cloud Account Engagement or other Salesforce software, speak to one of our consultants today.
Step One: Drag and Drop Components to Create your Landing Page
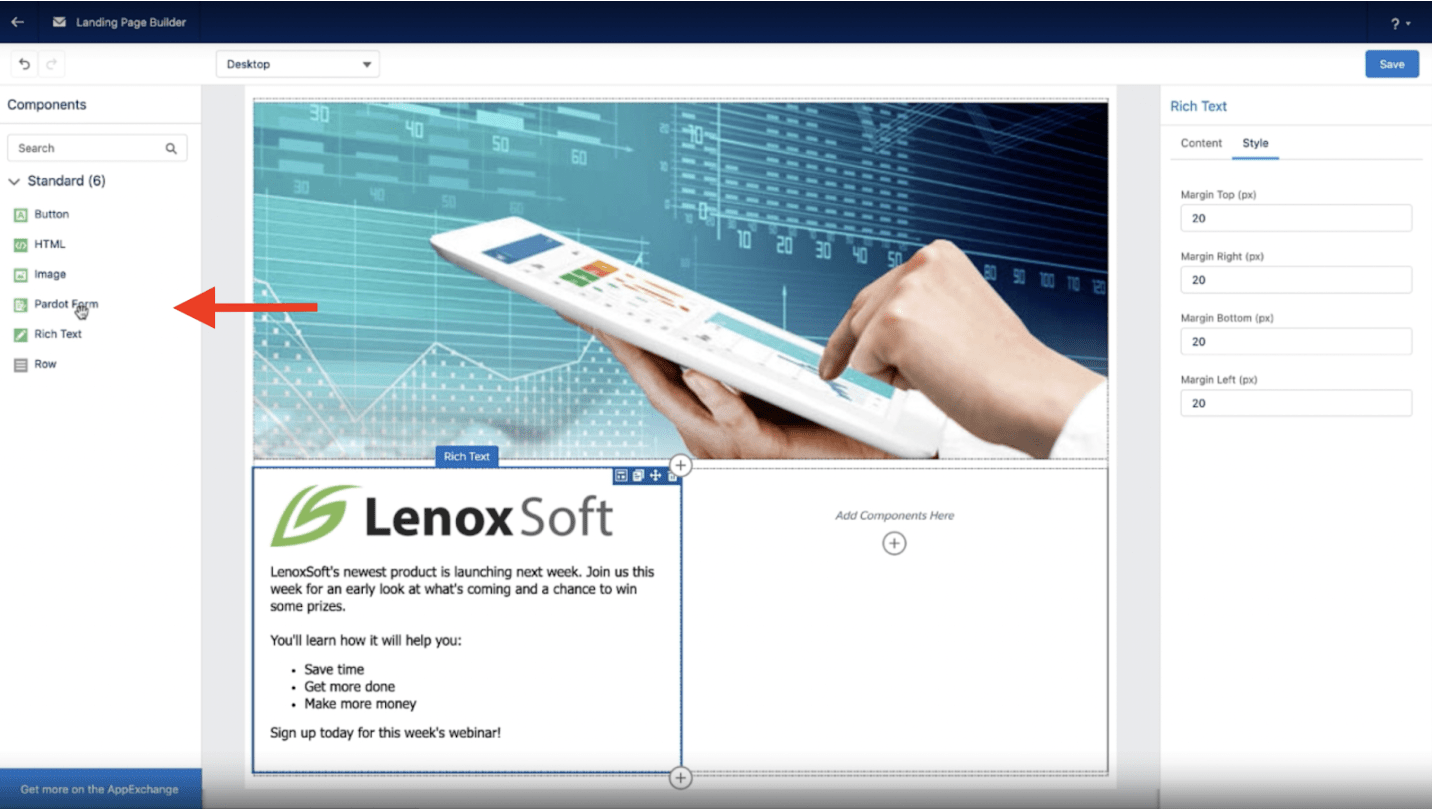
Drag-and-drop is probably the biggest feature in the new Marketing Cloud Account Engagement landing page builder. By compiling a landing page by dragging and dropping various content blocks into a page template, coding knowledge is no longer required.
To build your own landing page, start by picking a component such as a button or an image from the sidebar menu on the left. Drag and position them onto the working landing page, adding whichever components are necessary for your landing page. You can make adjustments to your positioned components, like adding a second column to a passage of text, using a pop-up menu on the right.
Step Two: Review the Responsive Design
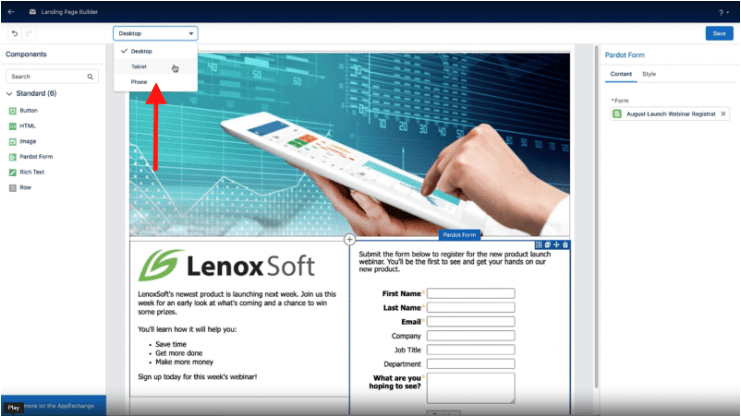
Creating a responsive landing page in Marketing Cloud Account Engagement couldn’t be simpler – mostly because the landing page builder automatically does it for you. Ensuring your landing page is responsive is important as it means your page will display properly on mobile, desktop and tablet, ensuring the best user experience at all times.
Without leaving the editing tab, you’re able to preview the responsiveness of your landing page across desktop, tablet and mobile formats. It is essential to review your landing page design to ensure you have played to the strength of each device display and experienced the page the way your customers will.
Step Three: Include any Personalisation
Take advantage of the personalisation capabilities provided by the Marketing Cloud Account Engagement landing page builder. Merge fields are limited to a number of objects but when it comes to personalisation, less is often more. Personalised information can be added to landing pages by manually typing the merge fields, for example {{FirstName}}.
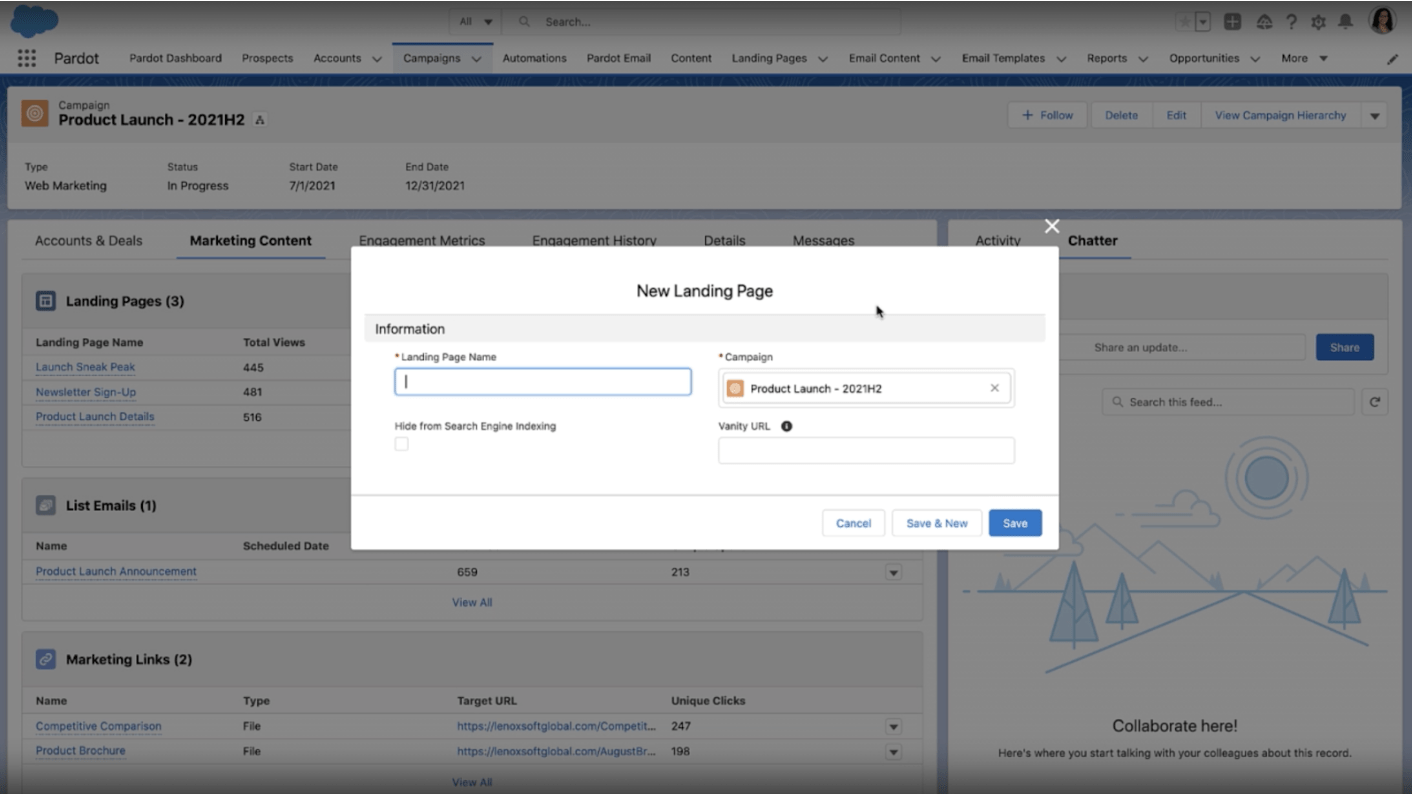
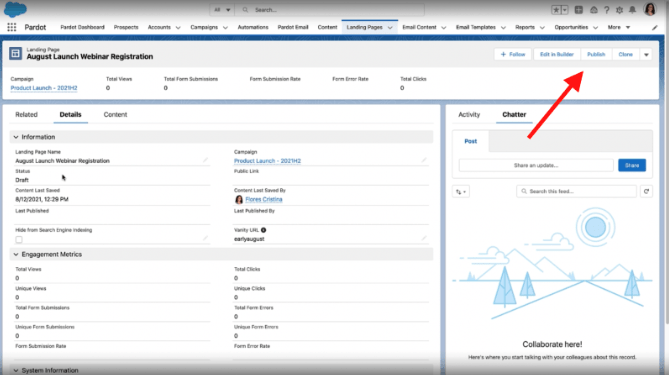
Step Four: Save and Publish Your Landing Page
Once happy with the design, save your landing page by clicking the “Save” button in the top right corner. The user interface will now display three tabs, namely Related, Details and Content. Clicking “Content” will allow you to preview your landing page, giving everything a final once-over before you go live.
When you’re satisfied with your landing page and the responsive design across all various formats, click the “Publish” button in the top right corner and take your Salesforce Marketing Cloud Account Engagement landing page live!
Step Five: Make any Edits and Monitor Your Results
Sometimes you’ll want to make a tweak to an image or some other piece of content after you have published your landing page. Doing this is as simple as going back into the builder and making the desired changes. Once complete and saved, you’ll notice the landing page status (under the “Details” tab) has changed to Published (Changes Pending). Clicking “Publish” in the top right will ensure your updates are reflected on the live landing page.
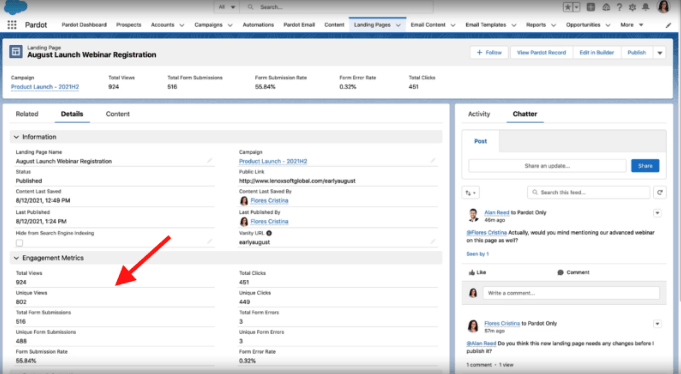
Don’t forget to monitor the performance of your landing page. Engagement metrics can be viewed directly under the “Details” tab.
A Couple of Bonus Tips!
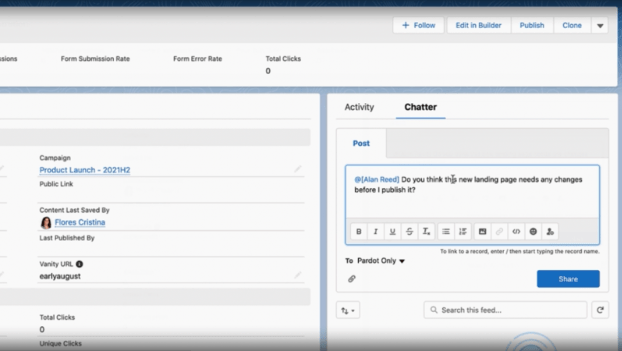
Tip One: Use the Built-In Chatter Feature
Although not strictly necessary for a landing page build, using the Salesforce Chatter feature is a great way to collaborate with other team members in real-time. Asking for multiple opinions and insights can be disastrous on some communication channels, but Chatter makes on-the-fly discussions a breeze. @ mention team members, and attach files and images.
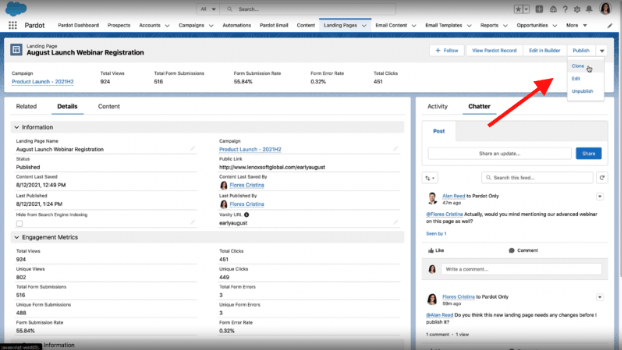
Tip Two: How Landing Page Templates Work
There may come a time when you want to build a similar landing page to something that already exists. To ensure uniformity and to prevent having to build something from scratch, a landing page template can easily be created by clicking the “Clone” button under the drop-down menu in the top right corner.
Cloning an existing landing page allows you to create a new name and URL, and make the relevant changes required to build your new landing page.
Make Marketing Cloud Account Engagement Work for Your Business
If you are looking to make the most out of Salesforce Marketing Cloud Account Engagement, you’re in the right place. As Salesforce Marketing Cloud Account Engagement consultants, Purus assists with training, support or help customising the platform to fit your needs. Get in touch with our team of qualified Salesforce advisors today to find out more.